Trade days toil

Standard

As I blogged about last time, I had many a table prepared to go to my booth at trade days. I worked very hard in the weeks prior to trade days accumulating furniture, then madly painting everything and trying to price it all effectively. This event was a true learning experience. What did I learn?

I learned:

*sitting outside in 90+ degree weather 3 days straight is terrible draining miserable. No other word to describe but miserable.
*hauling furniture to and from my booth was a ridiculous amount of work.
*why other vendors choose fixed indoor locations to sell their pieces.
*who my true friends are that chose to come sit with me in said miserableness.
*the term “flea market” being tossed around in lieu of “trade days” makes people instantly think anything priced above $10 is too high.
*rearranging the booth multiple times a day keeps me from being bored 😉

Will I do trade days again? No! Will I continue to paint furniture? Absolutely! As my husband & I discussed many times during that weekend, this was a learning experience and I now know what I am and am not willing to do. I met some great people that weekend, spread the word about my business, sold a LOT of milk paint, but I think that I’m going to keep my business home based for now.

I wanted to show a quick peek at a dresser I literally finished during the trade days and brought up on the last day. It sold at the last minute of the last day. Coincidentally I had purchased this chest from a local couple, who happened to stop by and see it and were quite pleased with its transformation.

Before:

20130701-092105.jpg

After:

20130701-092222.jpg

In all the hustle and bustle of trade days, the only pic I got of it “after” was in my booth.

Here are some more pics of my booth throughout the weekend:

20130701-092348.jpg

20130701-092620.jpg

20130701-092631.jpg

20130701-092645.jpg

Never stop learning!

~T~

Tables everywhere!

Standard

Over the last few weeks I have been accumulating furniture like crazy to have a full booth at the Wylie Last Monday trade days. I’m excited for the opportunity. I bought furniture from an estate sale, an auction, Craigslist and a local sales site.

I have a “set” amount I like to pay for certain pieces. End tables and night stands are quick sells and always seem to be easy to come by. That was true this time plus I ended up with 3 coffee tables. 2 of them are very very similar but were purchased 40 miles apart! 😉

Here are some pics of the pieces and their respective makeovers. All pieces in this post are for sale. Please email me for pricing and availability questions.

Matching end tables BEFORE:

20130619-183114.jpg
And AFTER in their Pitch Black milk paint goodness:

20130619-183157.jpg

20130619-183209.jpg

I adore this round end table BEFORE:

20130619-183316.jpg
AFTER in its 2 tone chalk paint finish:

20130619-183357.jpg

20130619-183403.jpg

Another end table BEFORE:

20130619-183845.jpg
And AFTER in its 2 toned glory:

20130619-183926.jpg

20130619-184008.jpg

Now for some coffee table transformations. This oval beauty BEFORE:

20130619-184104.jpg
I have 2 of these but finished them differently. The first in a custom Salem Red/Barn Red milk paint finish:

20130619-184804.jpg

20130619-184922.jpg
The second in a chalk paint/glaze finish:

20130619-184227.jpg

20130619-184236.jpg
Lastly a rectangular coffee table that I somehow didn’t end up with a before pic of! Here it is finished in Sea Green milk paint:

20130619-184436.jpg

20130619-184452.jpg

So here’s hoping my table excessiveness pays off at trade days this weekend 🙂 If you live locally I hope to see you there!!

~T~

What is Milk Paint?

Standard

One of the most common questions I get asked is: What is the difference between milk paint and chalk paint?

Well, I’d like to blog about milk paint. 2 reasons:

1 – I recently became a retailer for Old Fashioned Milk Paint Company, Inc..

and

2 – most people shy away from milk paint usage because it comes in a powder form and they are scared or unsure of how to use it properly.

I first learned about milk paint via Pinterest. I was excited to find a retailer where I could purchase some to try. I bought 2 different colors: Salem Red and Pitch Black. I have to admit I was nervous.
You can read about my 1st milk paint adventure here.

What I want to focus on today is how to use milk paint. Because, if I can do it, ANYONE can do it.

Before I go into the step by step instructions on mixing and using milk paint I want to add a few additional “pros” that swayed me to not only use milk paint, but to retail it also:

1 – it comes in powdered form and the brown bag packages are small and compact. I don’t have a lot of space to store cans and cans of paint and I’m very stingy with my space!

2 – I live in Texas. Summers here suck!! Weeks and weeks of 100*+ days. I recently had to relocate all my chalk paint inside because after being in the garage for a few 95*+ days the cans emit a sulfur smell when opened. I dislike having to store paint IN my house but I dislike stinky smells more!!

3 – I can easily blend colors and create custom colors while milk paint is still in powdered form. If you go to the color chart on the OFMP website you will discover that they have 20 colors but have recommendations on how to create 60 more variations of the colors by mixing to various specifications. Mixing chalk paint is a pain. I’m clumsy and messy and trying to mix paint already in liquid form is extremely difficult for me. You might not have issues, but I do. So my chalk paint colors are limited to the exact color that comes in the can. With milk paint I can use a pinch of each color and mix it, see if I like it, before I mix up an entire batch for a piece. It’s also easier to recreate if I don’t mix enough. I never could do that with chalk paint.

4 – it’s CHEAP!! $13 for a 6oz. packet of powder that I get 6-8 pieces painted with. I pay upwards of $35 per can of chalk paint and get the same coverage.

5 – NO VOC – the cool thing about milk paint is that it has been made without VOC’s before that became the “green” thing to do. Other paints I work with smell, and some smell worse after being stored in a hot garage! :-p

6 – it dries FAST!! I am able to complete my milk paint pieces in a day. Even when using multiple colors. When I’m painting 5-6+ pieces a week I love the fast drying characteristic!

Now that you are as excited about milk paint as I am – how do you use it?

Step 1 – choose your color (or colors)

20130617-201859.jpg

I chose driftwood this time. Milk paint is mixed equal parts paint powder to warm water.

20130617-201950.jpg
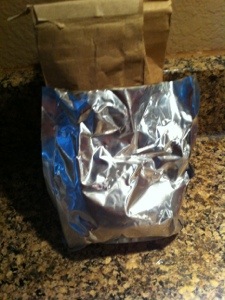
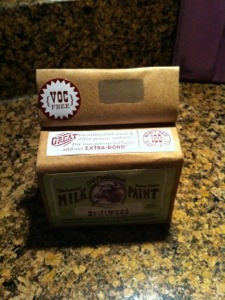
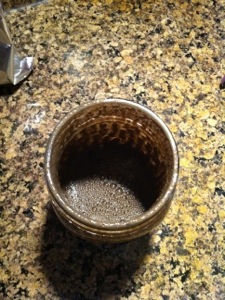
This is the foil package that the powder comes in, inside the brown bag.

20130617-202021.jpg
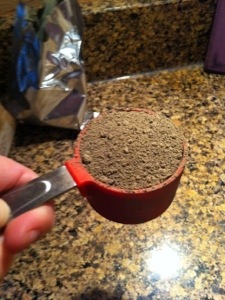
I find that a 1/4c. size scoop works for me for a medium to large size piece.

20130617-202114.jpg
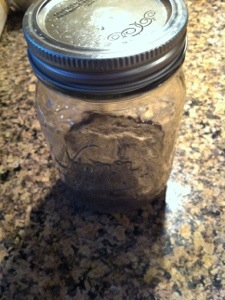
I used to mix my milk paint in a plastic cup and blend with a whisk but I wasn’t liking the consistency. I now use a mason jar and just shake shake shake. Plus, the remainder stores in the fridge better when it has a lid AND I don’t have to clean a whisk! 😉

20130617-202234.jpg

20130617-202242.jpg
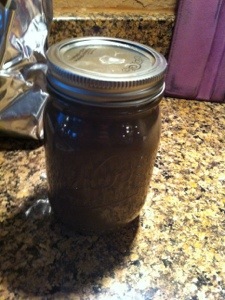
Shaken up, milk paint has a few bubbles but if I do it well, the clumps are gone. As soon as its shaken, it’s ready to be painted on.

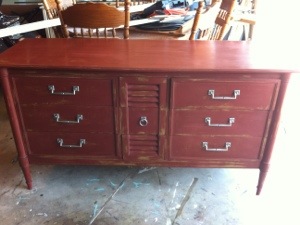
Here’s a piece I’m working on for trade days (BEFORE):

20130617-202357.jpg

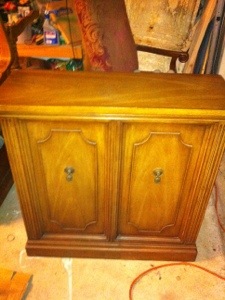
Here is the portion of milk paint that is partially dried:

20130617-202704.jpg

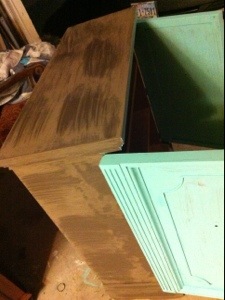
The darker portions are the areas that aren’t dry. This is a first coat so it’s patchy and shows the original wood through in some areas. A second coat will be used on this piece but it isn’t always necessary depending on the look you are going for.

Now, something that some people don’t like about milk paint is that it can chip and flake off some pieces of furniture but you won’t know when it is going to do it. I’m ok with that. But not everyone is. Something you can do is add bonding agent to the paint when mixing it, and it will solve that problem. I have painted multiple pieces with milk paint and I haven’t had the extreme chipping and peeling experience that most get. It could be the pieces I do, or the fact that I blend all lumps out, or just bad luck. I did have one piece that really chipped, and crackled like I have been hoping to see but it was for a client and not me 😦

20130617-203130.jpg

20130617-203148.jpg

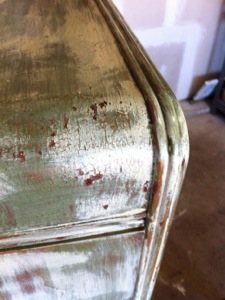
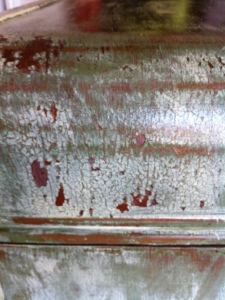
She is one of my favorite clients and was totally ok with that finish. The thing about the chipping and peeling is that once you seal it with tung oil or wax, it doesn’t peel or chip anymore. Like I said though, I don’t experience a lot of chipping/peeling when I use milk paint.

I hope that helps dispell any questions or fears you might have about milk paint. If not, feel free to comment or email me. I will have milk paint for sale in all 20 colors in my booth at Wylie Last Monday trade days 6/21-6/23. I’m also doing a giveaway for anyone who shares my Facebook page.

~T~

Open for Business…

Standard

After much prayer, consideration and time I made my new business official. I opened a Facebook page and I registered for a local trade days that is starting up in June. I’ve confirmed out of the 80+ other vendors that only one other person is selling furniture WOOHOO!! I even got one of those square card reader thingys so I can take credit cards 🙂 I have a plethora of emotions running through me…excitement, nerves, fear (doesn’t everyone fear failure?) and did I mention excitement? Casa de Cass Designs is up and running and I’m buckling up for the ride!

I love painting furniture, I adore the thrill of finding great pieces that need to made over. I’m reminded of the Confucius quote that says

Choose a job you love, and you will never have to work a day in your life.

When my family sees a garage full of furniture, I see a wonderland of treasures and I start to obsess over how each and every piece will be painted. I know it sounds crazy but most of the pieces I paint kind of speak to me and tell me what color they should end up. I love that!

Anyway, to help me build my business I’m asking everyone to share my page with anyone and everyone they know. It’s a small thing but I’m hoping to start doing classes and giveaways and in order to do that it is helpful if I have a larger audience.

June 21-23 is my first big “sales” opportunity at the trade days and I’ve secured almost all the furniture I think I need and I’m praying for a sell out event!

These 2 pieces are the first ones I’ve ever gotten that basically said don’t paint me! So they are coming to trade days with me and I will be selling them as is, but offering a paint option in case my buyer wants that.

20130607-000427.jpg

This is an adorable little wardrobe that I see in a little girls room or a nursery.

20130607-000503.jpg

This vanity pic was taken by the seller so the clutter you see is NOT MINE!! But aren’t they great pieces? I love love love them. They will be offered at $150 each or $275 for the pair AS IS 🙂

~T~
Facebook
Pinterest
Twitter

Denim Fabulousness!

Standard

Discovering my love of redoing furniture has been so fun for me. I have been able to make a little extra $$ for my family, and help people transform existing furniture they have. In between, I try and snag great pieces that I find on Craigslist or local sales sites. Thankfully, I’ve been able to sell those pieces as soon as I paint them and in this case even before I can paint them!

I bought this piece from a nice lady who had kept this chest of drawers for 30 years. She had even sanded and stained it herself. I almost didn’t tell her I planned to give it a makeover, but she was cool with it. Here is the pic from her CL ad. It was in great shape!

20130602-195349.jpg
I could see potential but I didn’t care at all for the rose knobs in place of drawer pulls. They were very Victorian and looked awkward to me:

20130602-195558.jpg
Don’t you agree?

I had it sitting in my garage when a friend was over. She saw it and we discussed how I had planned to paint it. She’s a very artsy, creative type and was open to lots of different ideas. (LOVE clients like this!) I had an end table that I somehow forgot to get a before pic of…..*DOH!* but she wanted that also. So…we decided I would use Annie Sloan Graphite and Cece Caldwell’s Smoky Mountain Gray. The end table I painted gray first, then put graphite on top and wet distressed til gray showed through. I sealed it with AS clear wax. I spray painted the drawer handle in black to freshen it up and I loved the finished product on this one. What do you think?

20130602-201039.jpg
For the chest, I removed the rose knobs and filled in the holes in the drawers with wood filler. I painted in Graphite first, then layered gray on top and wet distressed til the Graphite showed through. Once the drawers were painted, I added a single pull with a decorative backing detail that I had removed from a 2nd chest I painted camo (that blog coming soon…). I spray painted the single pulls black and my awesome husband drilled a hole dead center of each drawer so I could install the new fresh hardware. Here’s the after on the chest:

20130602-201654.jpg
A close up of the way the distressing looked:

20130602-201719.jpg
The side view:

20130602-202004.jpg
The customary before/after:

20130602-202024.jpg
Even though we reversed the order of the base coat and top coat, both pieces ended up very similar. A little more wood showed through on the end table, but mostly because I loved the deep oak color of it, as opposed to the light pine of the chest 🙂

20130602-202633.jpg
In person the finish really resembles a pair of well worn jeans. Love it!

~T~

Time out!

Standard

Several months ago, I blogged about some projects I did for my sister for baby Norah’s nursery (linky here).

A month or so after that I stopped at a community garage sale and found this great little chair for only $2:

20130527-225046.jpg

I knew instantly that Norah needed that chair as a “time out” chair. Her brother has one and it gets its fair share of use. Obviously Norah, taking after the women in our family isn’t going to need a time out chair 😉 but just in case….I snagged this one 🙂

I started sanding it and discovered that it had been blue, purple, white, green, yellow and flowery in its past lives:

20130527-225305.jpg
I decided to paint it black as a base and I just used some black latex paint I happened to have leftovers of. Well, after painting for months with chalk paint which dries in a matter of 5-30 mins depending on brand I was really not happy that the latex paint took about 3 days to cure properly 😦
See…..I like immediate results (read: I have zero patience!!). And when I don’t get that, I get bored and move onto something else. This is why chalk paint works so well for me! So while Norah’s black time out chair was curing, I got distracted bored and worked on about 6 other projects. So it sat…and sat…and sat!

20130527-225547.jpg
When I finally got a break from my other projects (and the date for my next trip to Lubbock started looming closer and closer) I mixed up the remainder of the guacamole paint I had used on Norah’s book case and got busy painting the lil chair.

20130527-225709.jpg
Following my sisters instruction from the bookshelf I only did minimal distressing (just enough for the black to show through) and then it was DONE!

20130527-225808.jpg
Not bad for a $2 garage sale find, huh?
~T~

Musical Tables

Standard

I have posted before about a dining table or two 😉

It started with us realizing that our current table wasn’t working in our small kitchen nook space:

20130525-130752.jpg
So I made it over and blogged about that here.
I purchased a table from Dumpster Diva and it looked like this:

20130525-131127.jpg
But it just wasn’t working for our space. I did lots of Pinterest research and came up with some inspiration photos like this:

20130525-131505.jpg
And a few other pins like this one and this one. So….I listed my black table for sale and went on the hunt for a round table. I found this on Craigslist:

20130525-131628.jpg
It came with 6 super sturdy chairs with loads of carved detail:

20130525-131732.jpg
And the table itself had some nice detail:

20130525-131803.jpg
I bought it and it sat in the garage until the black table sold (1 week!) and the day they picked up the black table I started painting the round table and all 6 chairs. My family reminded me that I had said NO MORE TABLES. Painting difficult pieces is like giving birth. During the process you say lots of things and afterwards, the bad memories fade! 😉
I painted the table and all 6 chairs from start to finish in ONE DAY! I used Annie Sloan Old White and heavily heavily distressed with 220 grit sandpaper. Then I waxed the chairs and table base with Annie Sloan Clear Wax and then did 4 coats of poly on the table top so we could eat at the table without placemats, coasters etc.
Here’s the table:

20130525-132145.jpg
Here’s the chairs:

20130525-132220.jpg

20130525-132230.jpg
The leaf insert which we may never use:

20130525-132257.jpg
Customary before/after:

20130525-132331.jpg
And the table all set up in our space:

20130525-132357.jpg
I’m going to add some different decor to the wall and replace the light fixture but for now I love the table and love the new look it gave our space and the size is perfect. Wonder how long til I start bugging my hubby to install those built in benches…?!? 🙂

~T~

“Sisters are different flowers from the same garden”

Standard

A side benefit to doing what I do, is getting to help people make over furniture that they like (it’s sturdy, it functions well etc) but they may not necessarily like the color or finish of.

My sister purchased some furniture from our grandmother right after she (sis) got married. She liked the lines of the piece and the great storage but after a while, I think the plain oak finish wasn’t to her tastes. So….when she discovered they would be moving back to Lubbock (where our mom and much family lives) when she was 7 months pregnant she asked me to come help with unpacking. Since I’m known as fairly OCD ahem, organized and available, she asked me. Through many conversations I learned that she also wanted her bedroom furniture made over. Clearly, she had asked the right person 😉

So I packed up my supplies,

20130522-101631.jpg I like to say “Have paint, will travel!”

(And my teenager) and headed to Lubbock. Here’s the furniture before and forgive my tired self for not reassembling the furniture for better “before” pics but I had driven 6 hours and unpacked 3 rooms the day before so I wasn’t really feeling it.
This was a tall chest:

20130522-101816.jpg
The nightstand:

20130522-101836.jpg
The dresser/mirror combo:

20130522-101918.jpg
And the headboard/footboard:

20130522-101939.jpg

20130522-101947.jpg
As you can see the furniture was sturdy, had great lines (love the curves) and was overall a quality set. She decided she wanted it painted white with slight distressing. So, I chose Annie Sloan Old White and after distressing I waxed it with Annie Sloan Clear Wax. The exception was the tops of the nightstand and the long dresser. I finished the bodies of those in wax, but sealed the tops with Minwax Polyurethane to withstand drinks, the occasional spill and my toddler nephew and soon to be niece 🙂
Here are some afters. First the tall chest:

20130522-102353.jpg
I bet you didn’t even pick up on these great details when you saw the “before” pics, did you?

20130522-102434.jpg

20130522-102443.jpg

20130522-102450.jpg
Something about white makes details just pop out on quality wood pieces. I LOVE IT!!
Here’s the nightstand:

20130522-102530.jpg
The dresser/mirror combo:

20130522-102552.jpg
This dresser/mirror pic was taken during the night (very, very late at night) so it appears yellow but that’s just the interior lighting. I promise it’s the same gorgeous white as the other pieces.

20130522-102654.jpg
Here’s the headboard/footboard that my teenager ended up doing under my supervision (see…anyone can do this!) because my arm was hurting from the 3 pieces I did the day before and the 14 pieces I did the 6 days prior to going to Lubbock. Must. Learn. To. Pace. Myself!!

20130522-102841.jpg

20130522-102852.jpg
Overall, I thought it was a great transformation. My sister feels like she got new furniture without having to spend new furniture $$, and I got to spend time with my sister, my brother-in-love and my amazing nephew. All because I decided to try painting one day. WINNING!!

~T~

Red and Black – client pieces

Standard

Over the months, I’ve had quite a few people approach me to quote them on painting custom pieces for them. I find that so cool. Not only do I get to make some extra $$ but I get to paint pieces of furniture that people will have in their homes for years. Wow.

This particular client had shared with me what she was looking for furniture wise and during my daily strolls through Craigslist I sent her links to things I thought would work. She found these great pieces…..

This long dresser:

20130521-140403.jpg
2 of these night stands:

20130521-140445.jpg
And a tall chest:

20130521-140508.jpg
With these 5 drawers that I was too tired to put back in just for a photo op:

20130521-140538.jpg
She decided she wanted the long dresser to be red with brushed nickel hardware. So I used milk paint in Barn Red and Salem Red and created a custom blend. Once painted and distressed, I used clear wax, then dark wax. Both from Annie Sloan.
Here’s a shot of the drawers with the left side waxed and the right side just painted and distressed. It really shows how the wax deepens the color:

20130521-140729.jpg
Here’s the completed piece:

20130521-140823.jpg
And the customary before/after comparison:

20130521-140847.jpg
She then decided she wanted the tall chest and the nightstands to be painted black and distressed with gray hardware. She wanted a true black so I chose CeCe Caldwells chalk paint in Beckley Coal. She wanted a medium to heavy distress so here’s how they turned out after distress and clear waxing with Annie Sloan clear wax:

20130521-141347.jpg

20130521-141354.jpg

20130521-141424.jpg
And the customary before/afters:

20130521-141446.jpg

20130521-141452.jpg

I was able to complete all 4 of these pieces in 3 days from start to finish. I loved the way they turned out, do you?

~T~

File that under Fabulous Find ;)

Standard

Another fun thing about my hobby/side job is that I periodically stumble across great deals for…ME!!

The first piece I did I usually refer to as “the piece that started it all” but others refer to it as “the first piece you did” or “that dresser thingy” when asking me how I created that finish. You can read about it here but I’ve decided to call that finish my “signature finish”.

I was cruising the online classifieds and I stumbled across this filing cabinet:

20130510-172926.jpg

For 2 years I’ve been managing our files in canvas totes. And hunting for the perfect cabinet (lateral, 2 drawer, decent looking, and CHEAP!) Then BINGO! There it was! $40 and a slight mishap during loading and it was all mine 🙂 Let me tell you that booger is H-E-A-V-Y!!

I rushed home and painted it in my signature finish. Annie Sloan Old Ochre paint with Minwax dark walnut stain as a glaze, then sealed with poly gloss.

20130510-173207.jpg

I spray painted the handles black and put it all back together and by the next day it was sitting next to my desk…which I also painted while it was in the garage during floor remodel 🙂

Here it was before ($20 online classified find):

20130510-173315.jpg

Here it is after in my “signature finish”:

20130510-173340.jpg

Here’s a pic of the filing cabinet inside (the colors always look different from my garage to inside the house:

20130510-173701.jpg
Now I have a nice little office setup that was made over in a day and I love it! Stayed tuned for more client pieces soon…..

~T~